Tag Archives: wine and food

Fun Food Friday — Piroshki (Russian: Pirozhki)


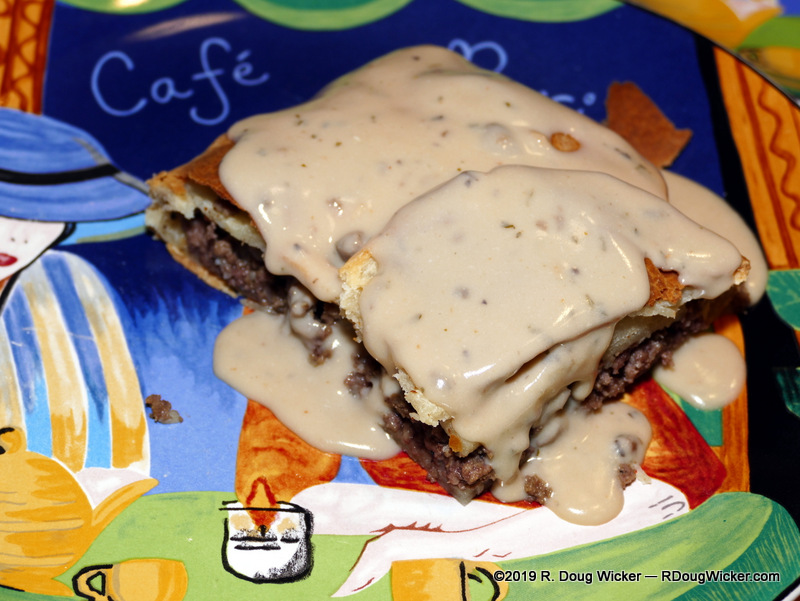
Piroshki with creamy garlic mushroom gravy

It’s time for my version of Russian piroshki, which I introduced to you on Wednesday’s visit to the Aragosta restaurant in St. Petersburg. While the Aragosta version of piroshki may be truer to the traditional, both Ursula and I think this recipe gives a superior tasting dish.

This is based on a recipe I’ve been making since my mid-teens. I picked it up from one of my mother’s cookbooks, and to this day I still recall how to make it from memory, with some personalization over the years and along the way. But today I’m writing it all down just for you. And best of all, this one is actually easier than the traditional, single-serving piroshkis, as it makes one large meat pie that’s easily cut into individual servings. So, here goes:

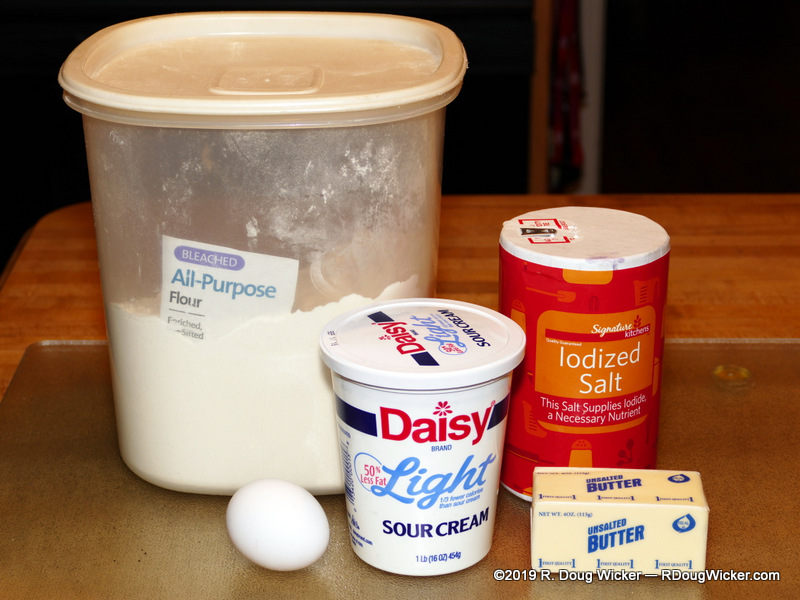
Piroshki dough ingredients

Dough Ingredients:

  • 1 stick of butter (4 oz.), room temperature
  • 1 egg, room temperature
  • 1 pound sour cream (I use light), room temperature
  • 2 tsp. salt
  • 5 to 5½ cups flour

Piroshki filling indredients

Meat filling Ingredients:

  • 3 to 4 pounds lean ground beef
  • 1½ tsp. granulated garlic (or several cloves of minced fresh garlic)
  • 2 medium yellow onions, finely chopped
  • Olive oil (for browning onion and meat)
  • Salt, to taste
  • Freshly ground black pepper, to taste

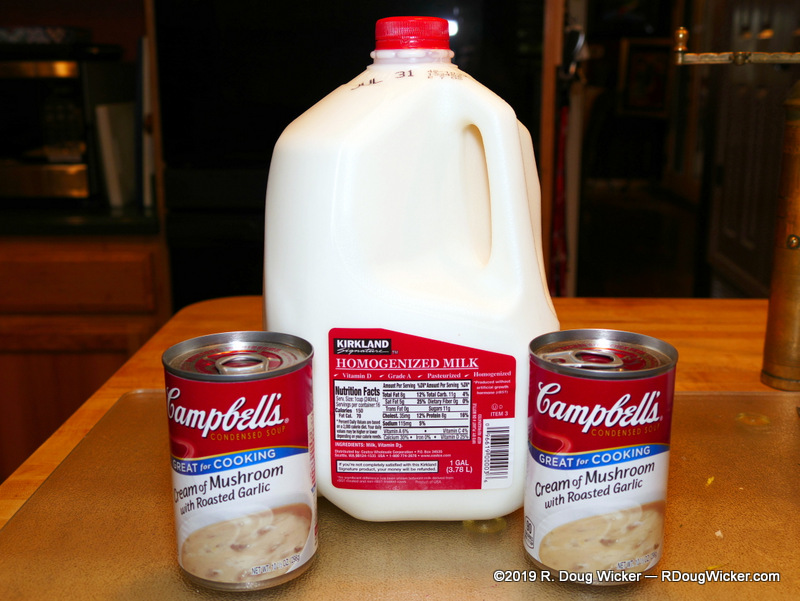
Piroshki “gravy” ingredients

“Gravy” Ingredients:

  • Condensed cream of mushroom soup with roasted garlic
  • Milk

Dough:

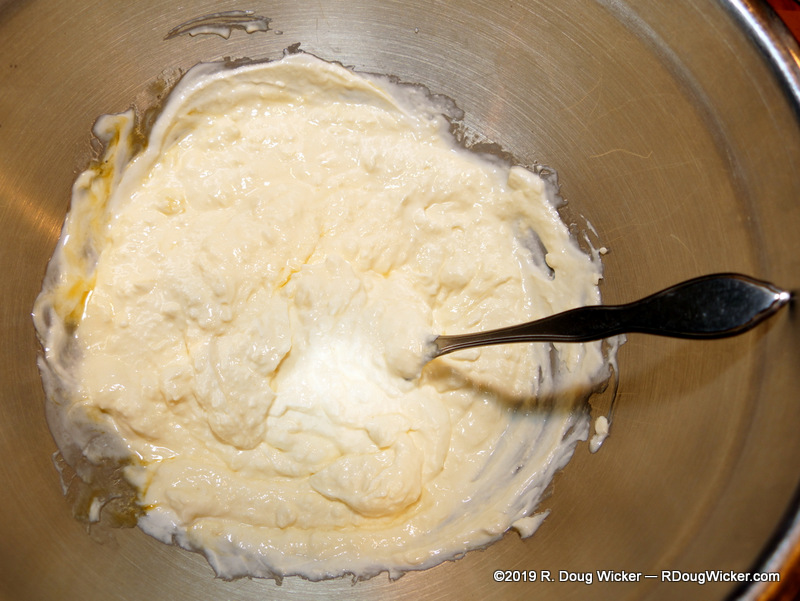
  • In a large mixing bowl, mash with a fork the softened butter. Mix in the room temperature egg, sour cream, and salt and stir together until the butter is in small, curd-like pieces.

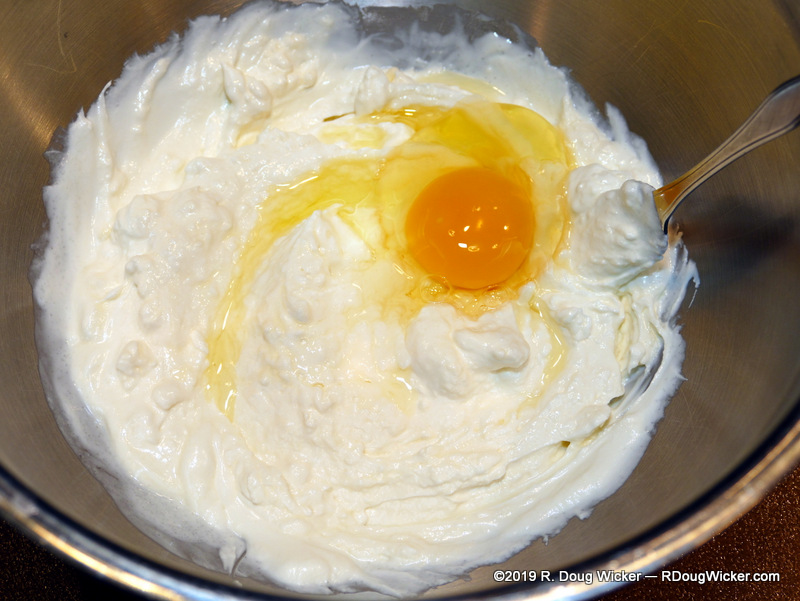
Mix together sour cream, eggs, butter, and salt

  • Stir in flour one cup at a time, fully incorporating the flour into the mixture with each addition.

Work in the flour

  • Don’t fear overworking this dough, as piroshki should not be your typical ‘flaky’ crust. It should have a smooth, almost clay-like consistency that, after baking, has a chewiness to it. If after the fifth cup of flour the dough still seems moist and slack, work in another half cup of so.

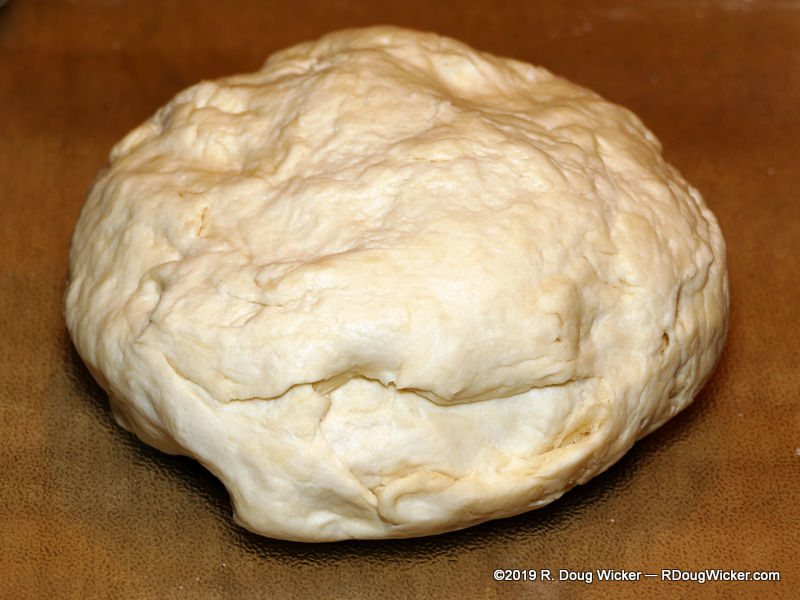
Piroshki ready to roll

Filling:

  • In a large Dutch oven or skillet, heat up some olive oil and sauté the finely chopped yellow onion until starting to brown.
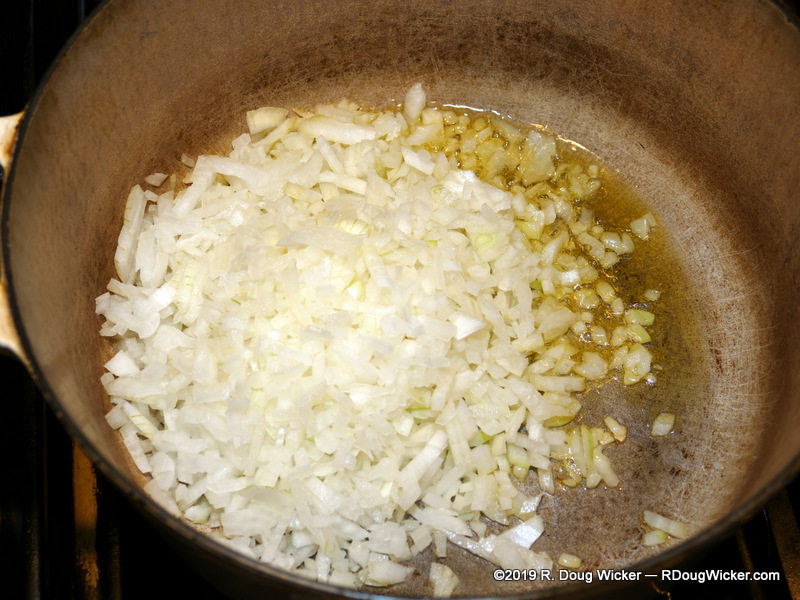
Onion and olive oil

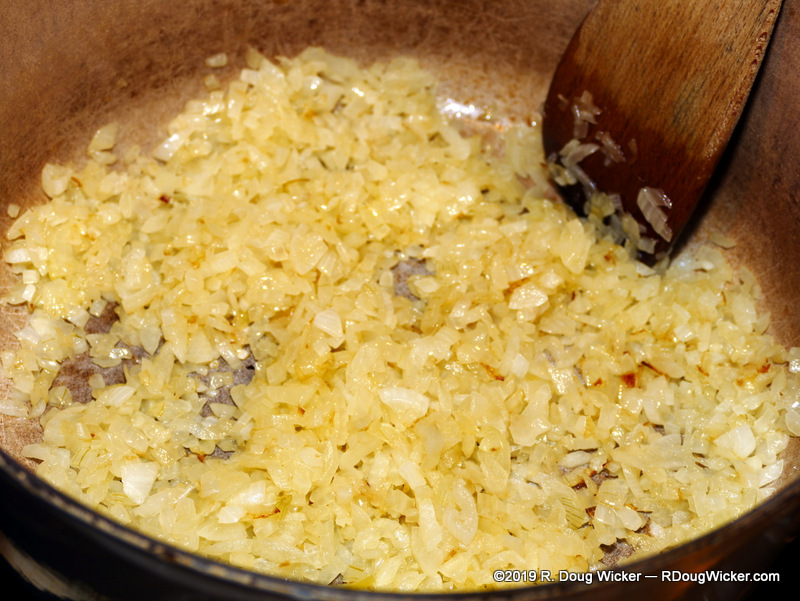
Slightly caramelized onion

  • Add the ground beef and cook thoroughly. Season with granulated (or fresh) garlic, and salt and pepper to taste.

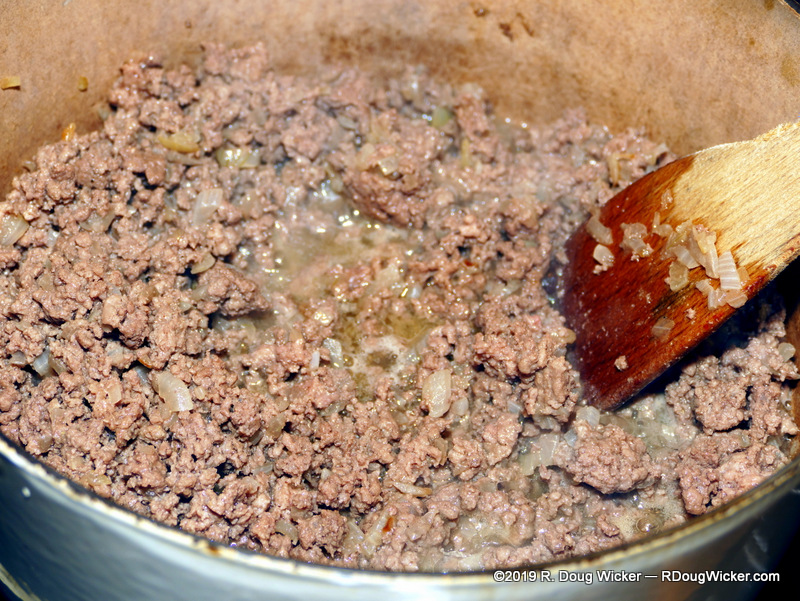
Add the ground beef to the onion and season away

Assembly Step 1:

  • Preheat oven to 357° F/190° C.
  • Roll out the dough. You want a relatively thick crust, so don’t overdo it.
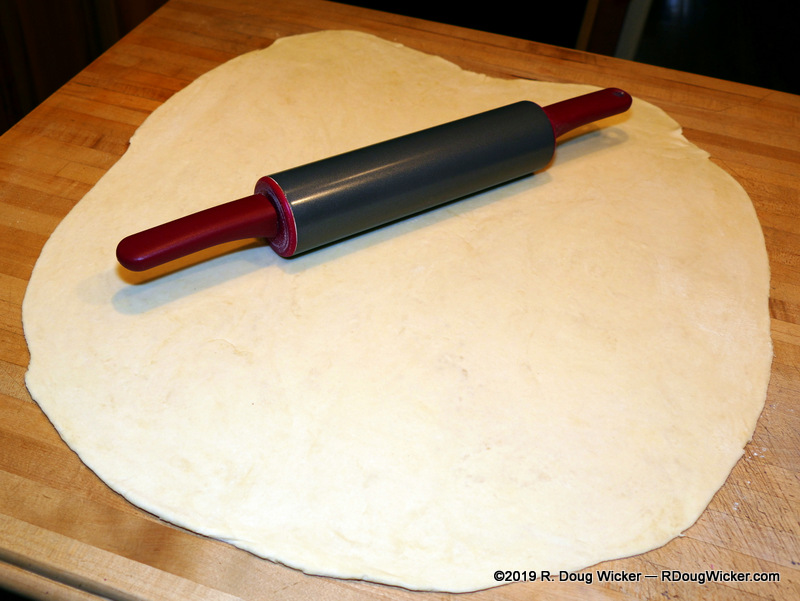
Roll out the dough

  • You want the final dough to extend far beyond the edges of your baking sheet, but using the measurements above you’ll have plenty with which to work. You’ll need this overlap later to fold over the filling.

Assembly Step 2:

  • Place the rolled out in a large baking sheet.

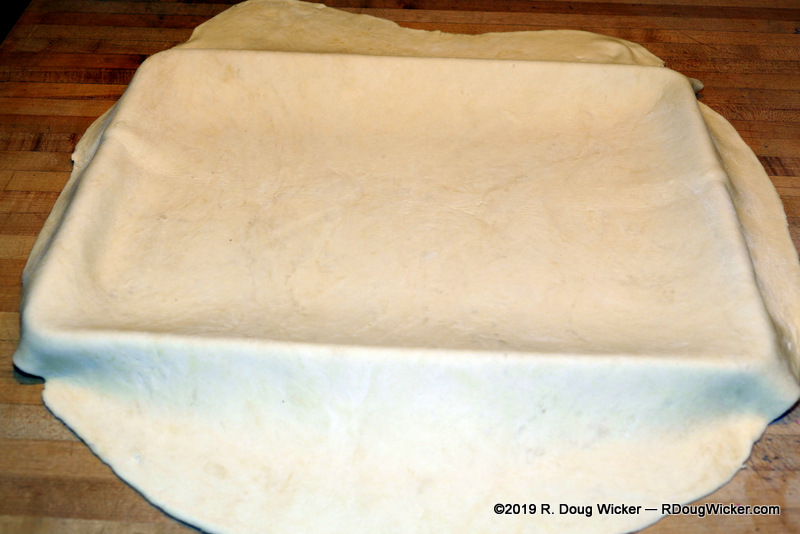
Ready for the filling

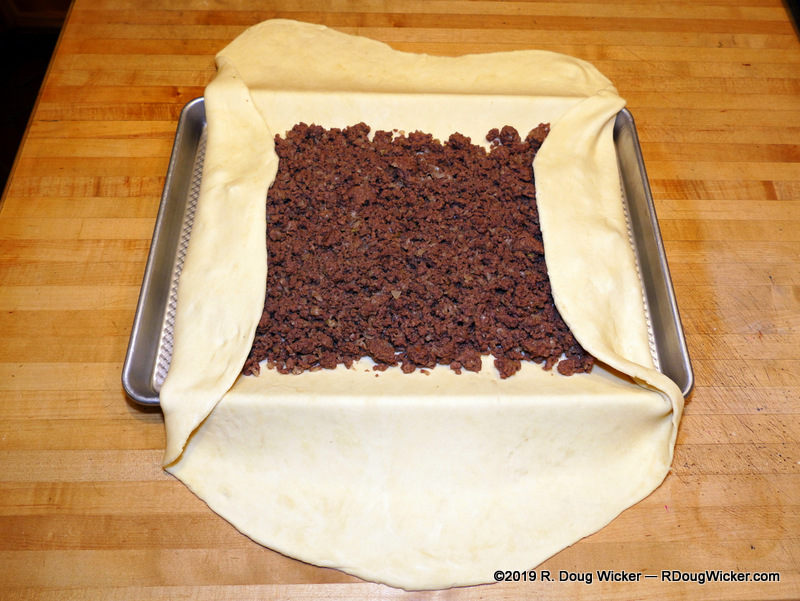
  • Pour it the meat filling.
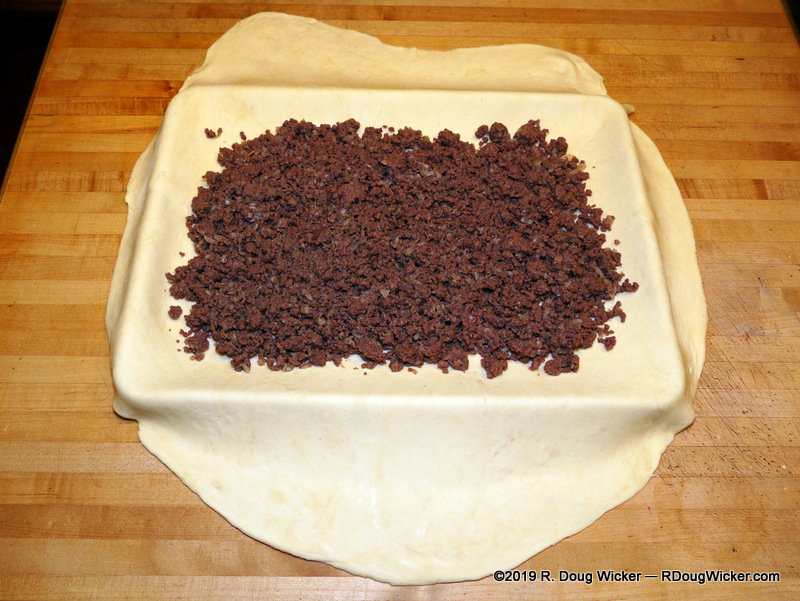
Meat filling

  • Fold the dough over the filling, first by folding in the ends

Fold in the ends

  • And then overlapping with the sides.

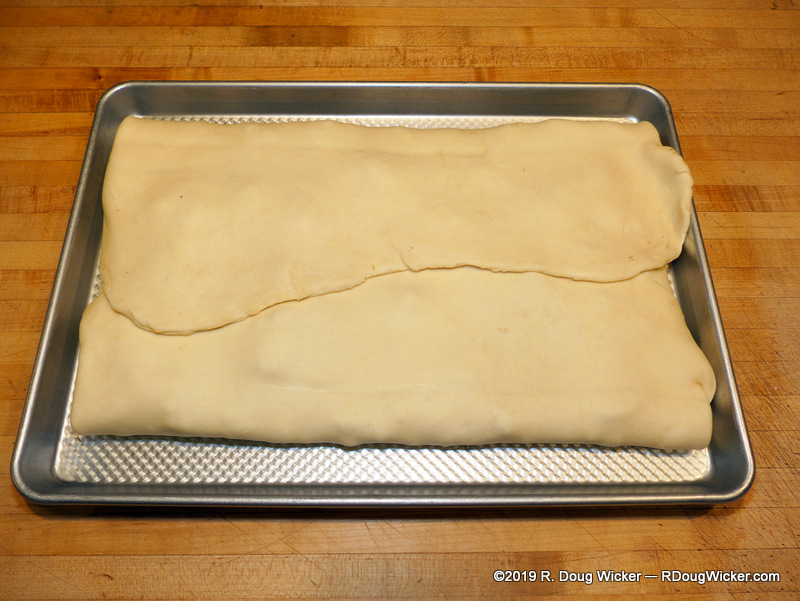
Overlap the ends with the sides

  • Make several large vent holes in the top of the crust. Place the piroshki in the oven, and start making the gravy (see next).
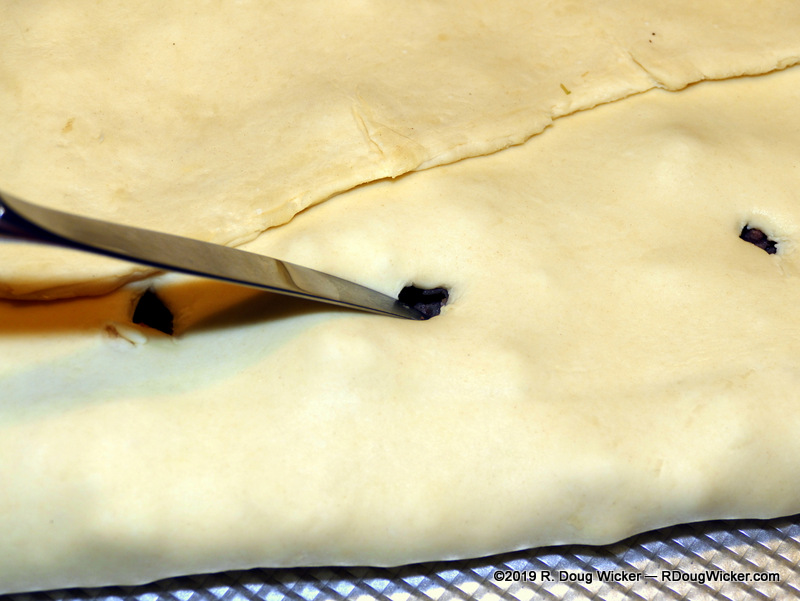
Make vent holes

Gravy: In a sauce pan combine the condensed cream of mushroom soup with milk, using a ratio of ½ can of milk for each can of soup (two cans will make a lot of gravy, so you may want to start with one first, then make more later for the leftovers). Heat to a simmer while stirring, switch off, cover, and plan to reheat just before the piroshki comes out of the oven.

Creamy, earthy, garlicky mushroom gravy

Assembly Step 3:

  • When the crust nicely browned, around 40 minutes or so, your piroshki is done. Remove it from the oven and let it sit for about five minutes while you reheat the gravy.
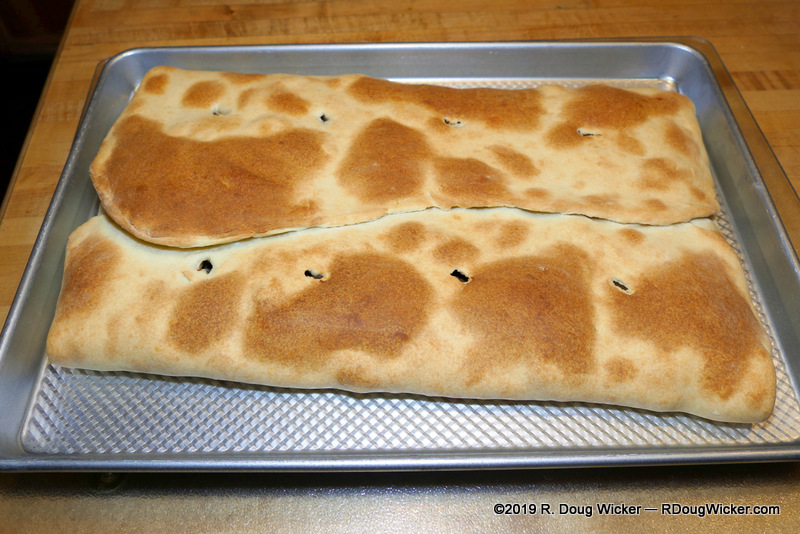
Baked piroshki

  • Plate serving-sized portions and cover with a generous amount of gravy. Enjoy.
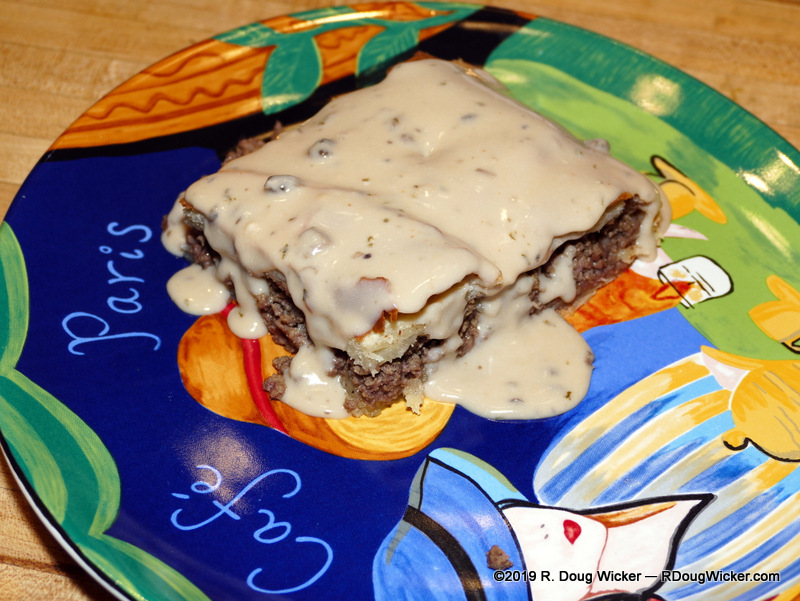
Mmmm, mmmm!

Now for a wine pairing: Piroshki is a hearty, meaty dish with a robust, earthy mushroom gravy. A creamy mushroom soup is usually paired with an oaky chardonnay, but here the mushroom is served as a condiment. Then there’s that wonderful, chewy crust made with sour cream, which seems to me to be a tough pairing, but I’m leaning once again toward chardonnay. However, it’s the seasoned beef filling that drives today’s choice. So, while a good compromise between these three flavors might normally be a pinot noir and would probably work very well, I’m going to bit bolder. With that in mind, I’m going to recommend in order of preference:

  1. A California Zinfandel
  2. Cabernet Franc
  3. An Argentine Malbec

A word about next week: This past Sunday I reran my Memorial Day article, but next Thursday is worthy of yet another commemoration. As such, I’ll be temporarily postponing a continuation of this series on the Baltic region. Instead, all next week starting Sunday I’ll be rerunning my six-part series on the D-Day Invasion of Normandy in recognition of the fact that next Thursday, the 6th of June, marks the 75th anniversary of this epic event.

Advertisement

Comments Off on Fun Food Friday — Piroshki (Russian: Pirozhki)

Filed under Fun Food Friday, R. Doug Wicker, recipe, Wine & Food

Fun Food Friday — Attempting to duplicate Katz’s pastrami


Pastrami closeup

Today I’m going to reveal my secret to duplicating (as best I can) the incredible pastrami that comes from the incomparable Katz’s Delicatessen. It’s not that difficult to do, and although I’ll be the first to admit Katz’s is still better, I believe this comes as close as you’re going to get short of a trip to New York City.

What you’ll need:

  • Good quality corned beef brisket (don’t skimp here; you get what you pay for)
  • The packets of pickling spices included with those briskets
  • Additional coriander
  • Additional black peppercorns

Pickling seasonings packed with briskets; additional coriander and black peppercorns

Start with a good corned beef

But before we work with the seasonings above, let’s prepare the corned beef briskets. Corned beef straight from the vacuum-sealed pack is rather salty, which is why you boil it. But you don’t want to boil a brisket that you’re going to smoke into pastrami, so forget that. Instead, soak your briskets in cold water for 24 to 48 hours, changing the water several times.

Soak in cold water

Now that the brisket is soaking, let’s get back to those spices. Using a mortar and pestle, or if you don’t have the patience, a spice grinder, crush together the pickling seasonings that came with the brisket along with additional black peppercorns and coriander to pad out the amount of seasoning available.

Mix spices into mortar

Crush spices with pestle or in a spice grinder

Now rub vigorously the spices into the corned beef briskets. Putting a little oil onto the meat while your doing this won’t hurt, either, but it’s not absolutely necessary. Wrap tightly the briskets in plastic wrap and refrigerate overnight.

Rub seasoning into meat; wrap and refrigerate

The next day load up the smoker. Make sure to keep up your water levels to prevent the briskets from drying. Maintain a temperature of 225°F/110°C. What wood? Whatever you like. I used hickory, and that seemed to work just fine. I suspect apple, cherry, or even pecan would also work well. Keep up the smoke for at least three hours into the process, after which you can concentrate on just maintaining water levels.

Loading up the smoker

Now smoke the briskets for at least six hours. When they’re ready to pull out of the smoker they should look something like this:

Six or so hours later

But you’re not done yet! If you’re having the pastrami the next day, allow the briskets to cool and then wrap tightly with plastic wrap and put them in the refrigerator. If you hunger for this for dinner, continue to the next step (which you would instead do the next day if you decided to wait). That next step is to place your briskets onto a rack over a roasting pan, and to place water into the pan below the level of the meat.

Place briskets on a rack over a roasting pan; add water to pan

Tent heavy duty aluminum foil over the roasting pan and rack, making sure that the foil does not come into contact with the meat. Wrap tightly the foil around the edges so as to trap steam from the water in the pan.

Tent tightly with foil and steam in the oven

Steam the smoked briskets in the oven between 250°F/120°C and 275°F/135°C for two to three hours — thicker steams longer; thinner steams less. Take the briskets out of the oven, keeping the meat, rack, and pan tightly wrapped. Allow to cool gradually for at least 30 minutes or so. Remove the foil while taking care to avoid steam burns! Now slice the brisket and thinly as you can.

Slice thinly

Get a nice Jewish rye bread, some mustard, and a good quality Emmenthaler cheese (that’s what we call Swiss with holes), and build your sandwich!

Serve on rye with a good imported Emmenthaler (Swiss cheese)

Normally, this is the point where I give a wine pairing. But, hey, we’re talking pastrami here. That calls for a light ale! If I absolutely had to pair a wine with pastrami, however, I believe I would lean toward a lighter, fruitier red. Here I’m thinking pinot noir, petite syrah, sangiovese/chianti, perhaps even a tempranillo. If I wanted something a bit more robust to compliment the smoke flavor, I might try a zinfandel, but a shiraz would probably be a grape too far.

Comments Off on Fun Food Friday — Attempting to duplicate Katz’s pastrami

Filed under Fun Food Friday, R. Doug Wicker, Wine & Food

Fun Food Friday — Cuenca, Ecuador; Cositas Restaurant Review


Cositas Restaurant on Simón Bolívar

On our first evening in Cuenca, Ecuador, Ursula and I asked various locals where they enjoyed eating for a taste of traditional local food. Several recommended the place you see here — Cositas 10-24 Restaurante. How good was this place? Good enough that Ursula and I broke away from the tour group the next night and, with two tour comrades in tow, returned for a second helping. More on the second visit and our companions in a moment.

Cositas 10-24 Restaurante

On our first visit to Cositas we noticed the wall was adorned with innumerable photos of celebrities and body builders.  Here we met an expatriate American who claimed she was the former spouse of one such body builder who also had starred in several movies. I asked the name of the actor/body builder expecting to not recognize the name at all, but she surprised me when she replied, “Steve Reeves.” “Hercules?” I asked. And, yes, he was indeed the actor from the ’50s Italian films Hercules and Hercules Unchained. She was very pleased that I recognized the name well enough to associate it with his most famous role.

Ties and Celebrity Photographs

Our dinner companions on our second visit were Purviz Eivazi and his lovely wife Fatemeh, a delightful couple from Henderson, Nevada, originally by way of Iran. An absolutely wonderful couple whose company we enjoyed very much.

Parviz Eivazi

Fatemeh Eivazi and Ursula

Unfortunately, Cosita has no printed menu, and I failed to make note of our orders on these two visits, but both Ursula and I recall that the meals were very good (obviously, since we returned), and that Purviz and Fatemeh also enjoyed their choices. In place of traditional menus, photographs and descriptions of various offerings are displayed on the wall as you first enter and behind the cash register.

Menus behind the Register

Menus on the Wall

Everything was nicely prepared and delicious, as you can see from these photos of our dinners:

Cositas Restaurant

Cositas 10-24

Cositas 10-24

On your visit to Cuenca I can highly recommend this enchanting place with its unique choice in decorating accessories, intimate dining areas, and charming owner and staff. Google Maps seems a bit confused as to the location, so beware. Costias 10-24 is at 4-49 Simón Bolívar Street between Mariano Cueva and Vargas Machuca, about three and a half easy walking blocks east of Parque Calderón.

3 Comments

Filed under Fun Food Friday, Photography, R. Doug Wicker, Restaurant Review, travel, vacation, Wine & Food