
Why am I repeating this recipe? Simple. When watching the Super Bowl what better way to graze than on smoked brisket smothered in barbecue sauce and then stacked high inside a hamburger bun?
Apparently there are a lot of people out there who are interested in the art of smoking meats, if my hits for Smoked Boston Butt and Mustard-Based Barbecue Hash are any indications. Today, I’ll teach you the secrets behind irresistibly delectable smoked brisket.
Brisket is probably the most challenging barbecue subject you’ll find. In it’s normal state a brisket is tough, fatty, not very flavorful. In short, it needs help. A lot of help. That help arrives in the form of slow, slow roasting at low, low temperatures, the tangy caress of hardwood smoke, and a flavorful rub consisting of a carefully balanced blend of complimentary seasonings. But this truly is a long-term project requiring about 1 ½ to 2 hours of smoking for every pound of meat, or around eighteen hours for a typical nine-pound brisket.
The first secret is that you want an untrimmed brisket. Brisket is by nature a very tough piece of meat, and you’re going to need the fat of an untrimmed one to both tenderize it and to transfer deeply into the meat the flavors of the rub you put on it, and the delicate smokey flavor imparted by your smoker. Just trim away a little of the fat cap — down to around a quarter- to half-inch thick along the top of the brisket.
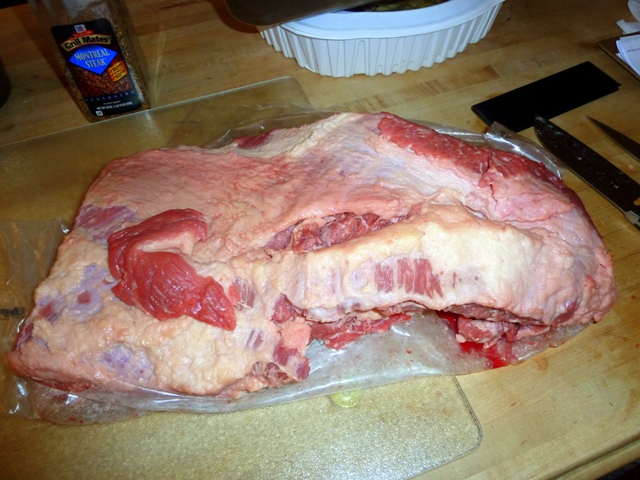
Untrimmed Brisket with some of the fat cap removed
Next comes the rub. You’ll find a lot of different rub recipes on the internet, but this one is neither overpowering nor does it conflict with the delicate smoke of the barbecue pit. It consists of equal measures of just five ingredients:

Homemade Rub Ingredients
Homemade Rub ingredients:
- Brown sugar
- Kosher salt (halve the amount if using fine-grain or table salt)
- Freshly ground black pepper
- A high-quality paprika
- A good, unadulterated chili powder (preferably a New Mexico mild red); by “unadulterated,” I mean nothing added to the chili powder whatsoever
Mix together the rub ingredients. Sprinkle a generous portion of the rub onto the entire exterior of the brisket. Work the rub into the meat. Sprinkle on more rub, and then tightly encase the entire seasoned brisket in plastic wrap. Refrigerate the seasoned brisket for at least twenty-four hours.

The Rubbed Meat

Wrapped and Refrigerated for at least 24 hours
Prepare your smoker as we did for Smoked Boston Butt, filing the water tray and placing either hardwood chunks or water soaked hardwood chips into the smoke box. Good wood choices here include hickory, oak, and pecan, or a combination of any or all of those woods. Mesquite can be used, but sparingly. If you like the flavor of mesquite, make sure you dilute that sharp mesquite tang by using two to three parts of the other listed wood for every part of mesquite or you’ll run the danger of overpowering the meat and imparting to the brisket a bitter, over-smoked taste.

Adding Water to the Smoker Water Tray

Loading in the Soaked Wood Chips
Just before you go to bed on the night before your brisket dinner, place your brisket into the smoker and adjust the temperature to 215° Fahrenheit (102° Celsius). Check water and wood smoke levels about every three hours (And you thought this was going to be easy? No way! Get out of bed and check that smoker!). The next morning you can now forgo adding any more wood. By now the smoke has done all it’s going to do for the flavoring of the brisket. From this point on you’re now concentrating on liquifying the internal fat so that it carries the rub and the smoke flavor from the outer layers of the brisket deep into the meat.
Into the Smoker
As with Boston butt, the internal temperature for which we are shooting is 185° (85º C) or higher, as we want the internal temperature to continue to rise to 190° (88° C) after the brisket is removed from the smoker and resting. At the sixteen-hour mark we can safely speed up this process because by now the internal fat should be liquified. Make sure the water tray is topped off and crank up the smoker heat to around 250° (120° C). Some people advocate tightly wrapping their brisket in heavy-duty aluminum foil during the latter stages and placing it back into the smoker to finish off. Don’t do it! Have you ever seen what happens to aluminum foil when it comes into contact with salt for any length of time? Yuck. No way I want that black oxidized aluminum embedded onto my brisket, and neither should you. If these foil advocates are getting dry brisket, it’s because they’re not properly maintaining the humidity levels inside the smoker via that water tray.

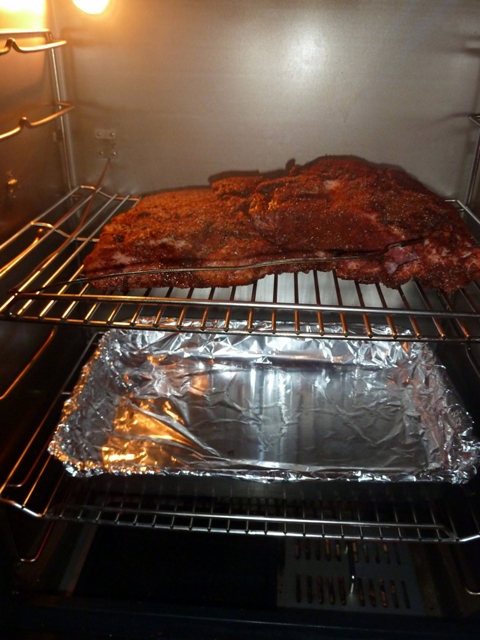
Almost Done — Time to Finish in the Smoker or Oven
Another method to speed things along is to take out the brisket, place it on a wire rack into a roasting pan containing a little water (just enough to keep it humid — about half a cup should do), carefully tent the pan with heavy duty foil while making sure that the foil does not touch the meat, and then tightly sealing the foil around the edges of the roasting pan. Place the roasting pan into the kitchen oven and roast the brisket at between 250° to 275° (120° to 135° C) for about one to two hours.

Brisket Tent Coming out of the Oven
After you hit that magic internal temperature number, remove the brisket from the smoker or oven and allow it to rest for at least half an hour. As we did with that Boston butt, we’re allowing the flavorful fats to once again congeal and lock in the moisture inside the brisket. Carved too soon, that fat and moisture will ooze out and leave you with a dry brisket. And, yes, there’s one more secret. That would be the secret to carving the brisket. You’ll notice two basic parts to your brisket. On top of the brisket will be a fattier meat with the grain of the meat running at a diagonal to the length of the brisket. Below that will be a leaner portion in which the grain runs in a slightly different direction. Slice into the brisket horizontally to remove the fatty portion and set that off to the side (the added fat makes this the logical portion to save as leftovers, or to carve last if you’re feeding a mob). Now, using a long and very sharp kitchen knife (under consideration for banning in the U.K. since the gun ban didn’t quell violent crime there), slice the brisket directly across the grain for maximum tenderness. Slices should be at least a third of an inch thick — too thin and the slices will fall apart; too thick and they may be a bit chewy.

The Final Product
Wine selection: Again, this is barbecue. Australian Shiraz is a natural. But it’s also beef, so other nice pairings include a Bordeaux-style blend heavy on the Cabernet Sauvignon grape; an aged, dark red California Zinfandel; or even an Australian GSM or the French equivalent Châteauneuf-du-Pape.


 Decisions — Murder in Paradise
 The Globe — Murder in Luxury