Every handgun owner should have one—a .22 caliber target pistol. The ammunition is cheap, making gun practice affordable. The recoil is considerably less than defensive calibers. Less recoil means you can better see if you’re flinching as you pull the trigger, and that makes for better control and greater accuracy later on when you shoot the big stuff.
I’ve owned a Walther P22 target pistol for several years now, and it makes a really great training weapon. It has a single-action/double-action trigger, an ambidextrous external safety that operates in the same direction as older Walther models, and a grip similar to more modern Walther products such as the P99 and the newer PPQ. The ambidextrous magazine release built into the trigger guard further emulates current Walther designs, although the levers are much smaller and therefore more difficult to manipulate than on Walther’s full-size weapons.
The Walther P22 also offers adjustable sights for long-distance target practice and replaceable grip back straps to customize how the butt of the weapon fits in your hand. The P22 is currently in its second iteration, now more closely resembling Walther’s PPQ. The version I own is much closer in appearance to the P99.
Many years ago I owned a Ruger Mark II target pistol and had fond memories of it. So, when I recently drooled over a newer Ruger Mark III 22/45 Hunter with polymer frame, fluted stainless barrel, fiber-optic front sight, adjustable rear sight, and a grip modeled after the famous Colt Model 1911, Ursula whipped out her credit card and insisted I acquire it. The Ruger’s value as a training weapon is a bit more limited; while the Mark III has an external safety, it looks and feels differently than on most similarly equipped weapons. The Ruger also has a straight single-action trigger—great for target practice, less so for defensive gun training, especially if you own a more traditional double-action/single-action weapon.
But being first and foremost a true target pistol, the Ruger 22/45 Hunter is outstanding in this application. The longer sight-radius and high-visibility fiber-optic front sight makes it a dream to aim. The more massive barrel gives the shooter a steadier hand and better controls what little recoil the .22 LR cartridge imparts.
I put these two weapons to a head-to-head test at an indoor range this past Saturday. My good friend Keith McKay brought along his Browning Buck Mark target pistol as well.
I set the target at my normal practice distance of 21 feet (6.4 meters) and tried the P22 first. Having much more experience with the Walther, I expected to out-shoot the Ruger at least initially, and the grouping of my first twenty shots was not bad—a ragged, more or less circular pattern approximately six inches across.
Next up was the 22/45. If I had any thoughts about being better with the Walther, they were quickly dispelled when I retrieved the target. With no adjustment of the sights and absolutely no experience at firing the weapon, I achieved a much tighter grouping (less than four inches across), better accuracy, and I experienced better recoil control and faster times reacquiring the target. There simply was no comparison on this test. The Ruger 22/45 was much better as a target weapon.
Keith gave both weapons a try and his results mirrored my own. This was especially instructive in that Keith had much less experience with the P22, having only fired it once before, and that was many months ago. Thus, Keith was for all practical purposes firing two unfamiliar weapons while still scoring better with the Ruger.
Interestingly, the Browning Buck Mark bested both of the weapons I was testing, but it did not beat out the Ruger by much and I found the hair-trigger of the Buck Mark a bit disquieting. Indeed, the first time I fired the Buck Mark, after having just fired both the 22/45 and the P22, the trigger broke well before I was expecting.
As a target pistol, the Ruger has it all over the Walther. It’s more accurate, easier to aim, displays less recoil, and is faster getting back on target for followup shots. Alas, all is not peaches and cream with Ruger’s Mark III design, however. I remembered that my older Mark II was a bit of a pain to reassemble. Well, Ruger took a bad reassembly procedure and managed to somehow make it infinitely worse. Part of this I attribute to the magazine safety, which requires a magazine to be inserted into the weapon in order to manipulate the trigger and thus the internal hammer. As the hammer has to be uncocked for some portions of the disassembly/reassembly and cocked for other portions, this means you’re frequently inserting and removing the magazine as you struggle to get the weapon back together.
Compounding this idiocy is one of the worst owners manuals I’ve ever encountered. The instructions for disassembly and reassembly are overly complex, counter-intuitive, apparently contradictory, and difficult to perform. How bad is it? This bad—Ruger states in the owners manual that you can watch a video on how to take the 22/45 apart and put it back together by going to their website at www.ruger.com. Go to that web address and see if you can locate it. Ruger couldn’t even make finding the video easy, and that’s just colossally stupid after you’ve just sent a frustrated customer there.
So, it was off to the internet to see other videos put together by YouTubers who kept telling me how simple it really is. Here’s a clue, guys—if it was really that simple, you wouldn’t be producing a video on how to do it and those videos wouldn’t be getting the hits they’re getting. Don’t insult your potential audience by making claims everybody knows to be false just by the mere fact you’re making a video on how to do it.
As you can tell, those smug and self-serving videos telling me how easy reassembly of the Mark III is were of little help, so I started searching for written instructions. That’s when I stumbled upon this simple, eight-step disassembly/22-step reassembly procedure. Now, come on, Ruger, was that so hard? If it was, hire this guy to write your manuals for you. It’ll be money well spent.
Note: One quick point about the Browning Buck Mark—according to the owners manual for that weapon, there is no authorized procedure for taking it apart for cleaning and lubrication. That alone puts the Buck Mark on my do-not-purchase list no matter how good it is. Sorry, Buck Mark fans.
A word about functionality—The Walther P22 can be converted from a five-inch target pistol to a standard configuration model with a 3.42-inch barrel by removing the compensator and installing a separately purchased shorter barrel. Can’t do that with the Ruger.
And the Winner is:
Walther P22 for handgun training
Ruger 22/45 Hunter for target shooting in every regard (aiming, accuracy, recoil management, followup shots, etc.)
Walther P22 for ease of maintenance
Walther P22 for functionality (with optional barrel conversion kit)
If you’re looking for a straight target pistol, however, don’t underestimate the frustration level when attempting to reassemble the 22/45. Spending an hour struggling to get your pistol back together after cleaning and lubrication will totally negate any sense of satisfaction you may have had a short while earlier on the range. Trust me on this.
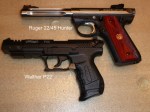
Now for the pictures:




















 Decisions — Murder in Paradise
 The Globe — Murder in Luxury

