Monthly Archives: June 2011

Black & White Photography—It’s All in the Color!


Photography, even Black & White photography, is all about color.  Yes, you read that correctly.  It truly is all about the color.  If you don’t believe me, take a look at some of Ansel Adams’ iconic work.  There’s a secret to how he got those dramatic skies, puffy white cumulus clouds that popped right out at you, and those sharp tonal ranges and high contrast that gave his work an almost three-dimensional quality even though they were merely shades of gray.  And that secret didn’t just start in the developing room; it started in his choice of colored filters.

There are four basic filters that a photographer uses in Black & White photography.  For landscapes, flora, and still-life photography, those filters are usually yellow, orange, and red, mostly depending on how dark you want the sky and foliage.  For portrait photography, green is the filter of choice as it increases the contrast and tonal range of most skin tones.  (Note:  Next time you watch an old B&W Three Stooges short, bear in mind that the actors are in green makeup.  Same thing for the actors in most old B&W television shows.  Back then, the actors were “filtered” rather than the camera lens.)

The choice of which filter to use depends on what spectrum of colors you want darker and what colors you want lighter.  A red filter allows the red of, say, some recently harvested radishes to pass through the filter easily.  Colors tending toward the greens and blues would be blocked.  The result on a Black & White photograph is that your radishes would come out looking bright, but the attached leaves would be considerably darker.  Substituting a green filter would darken the radishes and lighten the leaves.

But you may not need to purchase all those filters if you have a modern DSLR.  Since color filtering is similar to white balancing, you can digitally apply color “filtering” in-camera, or even in post-processing on your computer using the software that came with your camera.  But in order to obtain optimum control, you’ll need to shoot in your camera’s native raw format (see my two-part blog on raw versus JPEG:  Link to Part 1 and Link to Part 2).  Taking your pictures in raw will allow you to post-process the photograph with a digital yellow, orange, red, or green “filter,” or, since all sensor pixel information is retained in the raw file, you can make the photograph color again.  Neat trick, huh?  If you shoot in JPEG using your camera’s monochrome setting, you may want to take a series of shots using the different digital “filters” in your camera’s menu under the “Monochrome” picture style, then choosing which filtered effect worked best when determining which shots to keep.

For purposes of demonstration, all the photographs used in the rest of this article are minimally post processed to concentrate on the actual filtering effect rather than any demonstration of computer mastery.  If I were processing these photographs for display or printing, I would go further in enhancing contrast and tonal quality, but then you wouldn’t know if you were comparing filtering effects or my post-processing techniques.

This first set of photographs show a multi-colored spring toy I like to use for color calibration.  The first shot shows the rainbow spring in color (Canon Standard Picture Style).  Following renditions (using Canon’s Monochrome Picture Style) are Unfiltered, Yellow Filtering, Orange Filtering, Red Filtering, and finally Green Filtering.  Note how the yellow, orange, and red filters are basically just varying degrees of the same effect—gradually lightening the yellow-to-red range while darkening greens and blues.  The green filter gives the opposite effect.

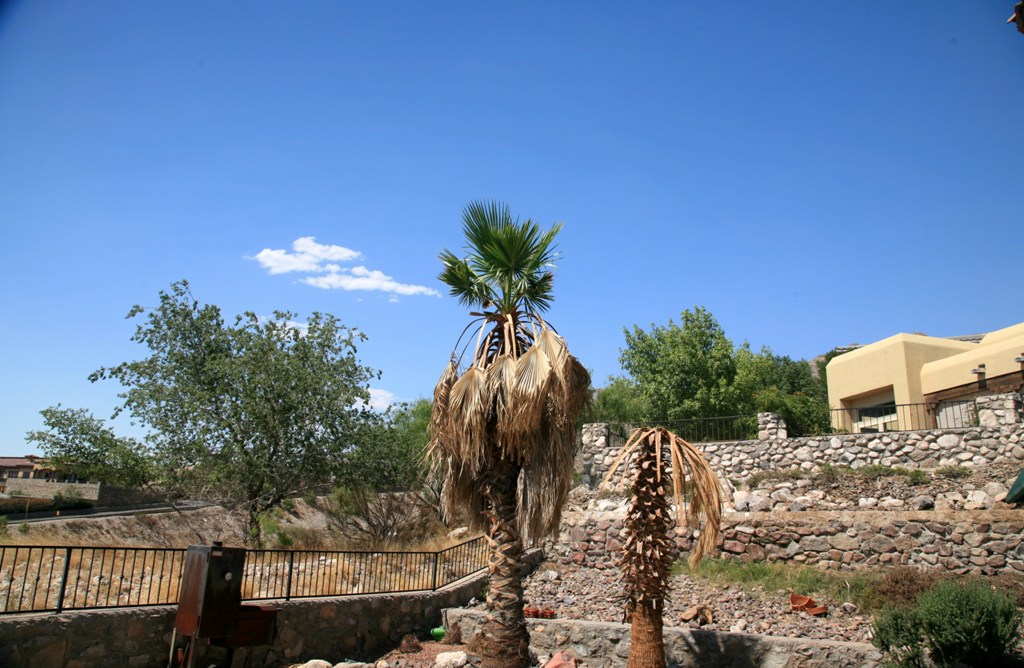
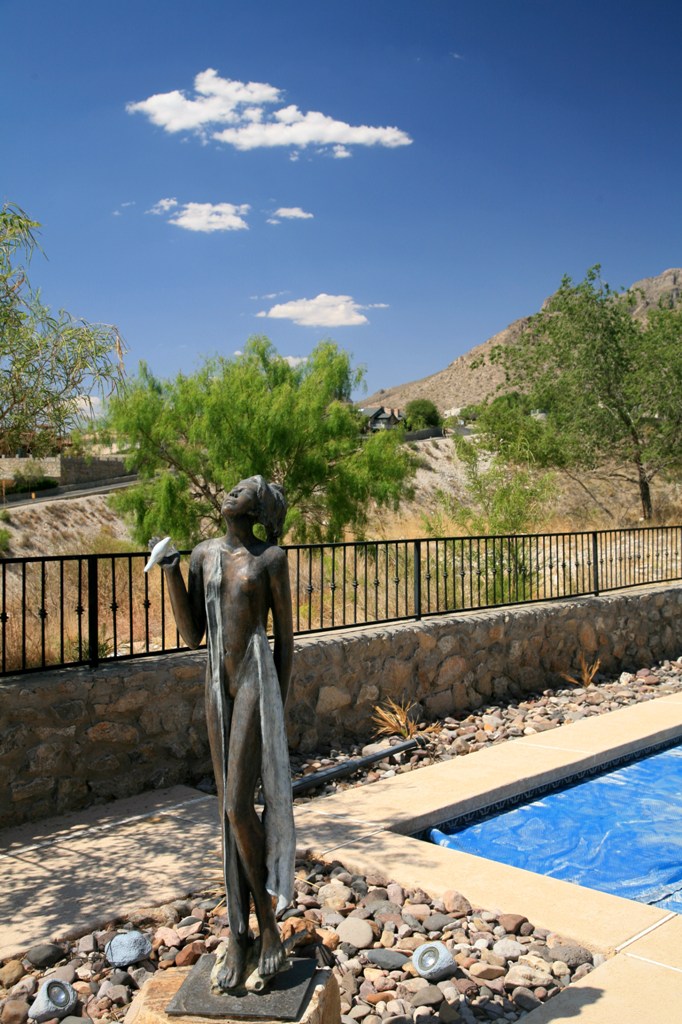
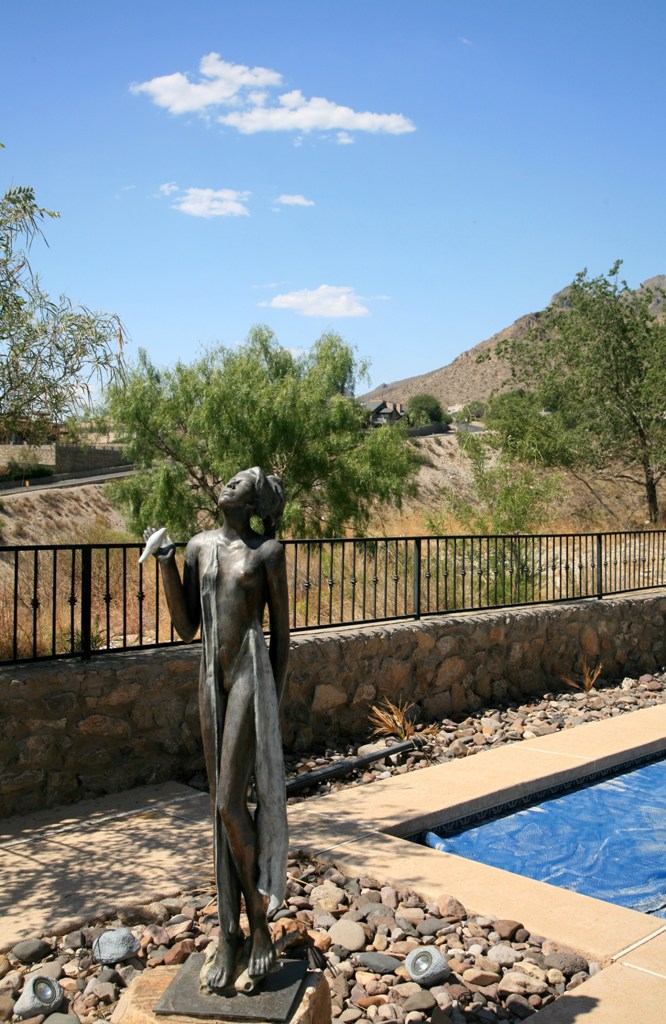
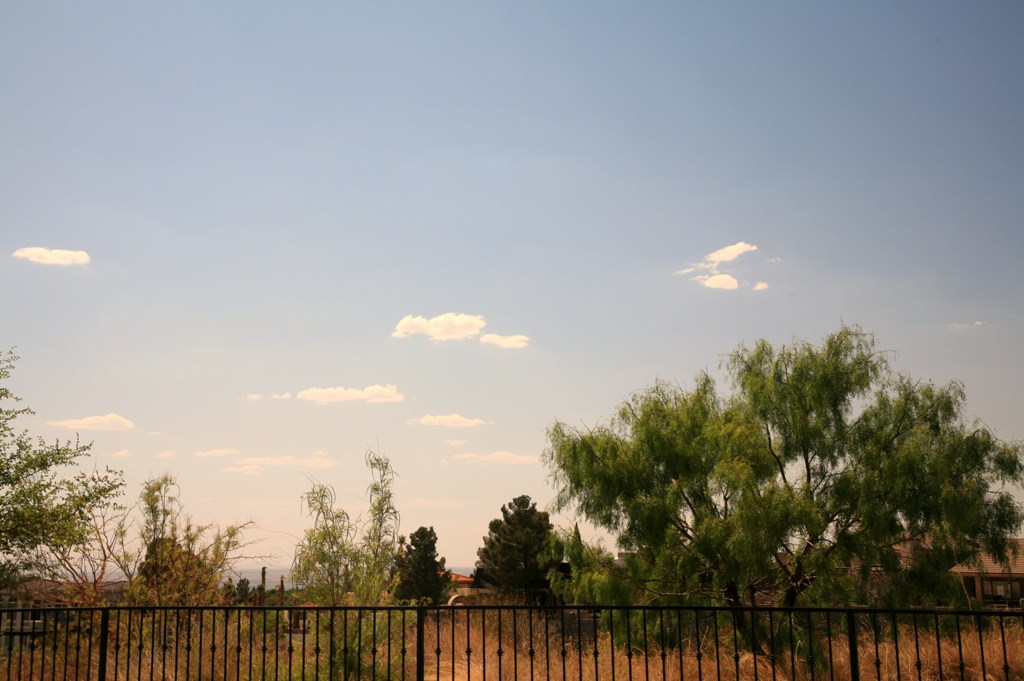
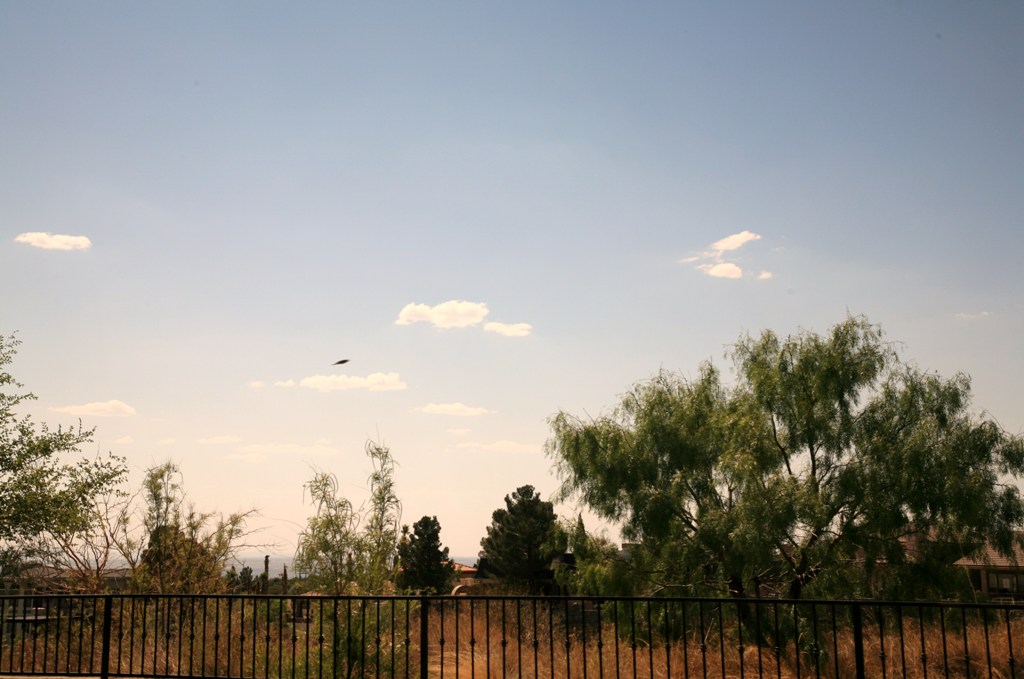
So, WWAAD?  (What Would Ansel Adams Do?)  What was his secret for those dynamic, awe-inspiring landscapes?  How the heck did he do that?  Well, besides some really fantastic artwork in the darkroom, involving some really advanced techniques over hours and hours of processing and developing, most of his more stunning works started out in the field with a dark red filter.  So, there you have it.  If you want the digital equivalent of Ansel Adams, start with your camera’s red filtering in its monochrome picture style.  Throw in a Polarizing Filter (see Monday’s blog at this link) on top of that red filtering effect and your skies will darken even more, coming even closer to Ansel Adams’ much darker red filter.  If you don’t want that much drama, you should at a minimum set your camera to yellow filtering for most landscapes because if you don’t throw in at least some filtering at the warm end of the spectrum (“warm” colors are yellows, oranges, and reds; “cool” colors are greens and blues) then your monochrome sky will be too bright and any clouds will fade or perhaps even disappear into the background.  The following set of photographs show the effects of unfiltered B&W photography followed by yellow, orange, red, and finally green filtering.

And, finally, that takes us to B&W portrait photography and the use of the green filter for enhanced skin tonal quality and contrast.  In the following set, compare the unfiltered photograph followed by the green photograph beside it.  Then take a look at what happens using your warmer “landscape” filters, going from yellow to orange to red.  Notice how the skin gets progressively more washed out and ghostly looking when using warmer filters.

I hope you’re enjoying this week’s series on photography tips and finding them useful.  If you have any comments, I’d love to hear from you.  And if you have suggestions for future photography blogs, that would be really great.

7 Comments

Filed under Photography

Talk Radio Isn’t the Only Thing That’s Polarizing


This is photo tip week.  We’ll be emphasizing filters and filtering effects both today and Wednesday.  As for Friday, well, we’ll have to wait and see as I’ve not yet quite made up my mind, but I’m leaning toward how to photograph real estate (or even your own home).

If you have a DSLR, or any of the more upscale cameras that have filter threads over the front of the lens, there is one filter that every serious photographer really must possess.  This is the Polarizing Filter.  The digital age has made color correction filters practically obsolete, as you can usually change the color white balance to whatever you’ll need.  In the case of black and white pictures, advanced cameras also allow you to internally set a “digital” filter that emulates the standard Green, Yellow, Orange, and Red Filters most frequently used in monochrome photography (Wednesday’s blog will be on this subject).  However, the effects of the Polarizing Filter simply cannot be duplicated by any digital means, as this filter acts directly on the light prior to it entering the lens by changing the light’s very nature and quality.  Digital filtering can only change how light is interpreted by the camera after the light has struck the camera’s sensor.

So, what does a polarizer do?  Well, most reflected light is polarized light.  An example of this is the blue sky, in which sunlight is scattered (i.e., “reflected”), off particles in the atmosphere.  This “scattering” (reflection), particularly in the blue wave lengths, is why the yellow sun causes what we perceive to be a “blue” sky.  This polarization effect occurs on pretty much all reflections off any nonmetallic surfaces.  By placing a Polarizing Filter between the object being photographed and the focusing lens (whether that “lens” is your camera or your eye) and then rotating that filter, you can block most of the polarized light while allowing most non-polarized light to pass through relatively unchanged.  Put on a pair of polarized sunglasses and you’ll see what I mean.  After you don them, tilt your head from one side to the other.  The intensity of the sky will change.  Tilt one way and you’ll see that familiar light blue color.  Tilt the other way and, as the scattered,  polarized light is blocked, the sky darkens dramatically.  This same effect works with reflections off water—tilt your head the right way and those sunglasses will all but eliminate the reflections you see on the surface of a lake, pond, stream, or even a swimming pool.  Reflections off, say, a highly polished chrome or a mirror remain non-polarized, and would therefore be unaffected by a Polarizing Filter.

A Polarizing Filter for your lens does the same thing.  It a piece of polarized glass mounted on a double ring.  One ring attaches to the threads on your camera’s lens.  The other ring allows you to rotate the filter glass to change the effect.  Orient the filter one way and the effect disappears.  Orient the filter 90° left or right of that and the sky will darken or reflections off water or glass will practically disappear.  A side benefit to this reduction in reflectivity is that colors often appear enhanced and more vibrant or saturated.  Use a Polarizing filter to tame the polarized light bouncing off flowers, green leaves, and other vegetation, and you’ll often get a lot more apparent color saturation in your landscape photographs.

But there are limits to polarization effects.  Polarization effects on blue sky work best at right angles to the sun.  If you photograph a scene either in the direction of or directly away from the sun, the effect is reduced.  For this reason, using a lens with a very wide angle will cause the polarization effect to be more pronounced in some areas and less pronounced in others.  That’s because with a wide angle lens, you’re taking in a much wider swath of sky.  A wider area takes portions of the photograph out of that optimum right-angle and includes sky that is more in line with the sun.  This rule also applies to reflections.  If you’re taking pictures of water and the sun is reflecting directly off the surface back toward your lens, don’t expect to get much benefit.  The bright reflected sunlight will still wash out your picture of the water and may very well trick your camera’s exposure meter into underexposing the shot.

A polarizing filter can also change your camera’s focal point.  Suppose you’re taking a picture of a palm tree reflected in a pool of clear, still water.  If the polarizer is rotated for minimal effect, the camera will most likely bring the reflection into sharp focus, thus leaving whatever is beneath the surface blurred and out of focus.  Rotate the filter 90° so that the reflection disappears, and the camera will focus on something below the surface of the water.

If your camera has filter threads, and if you decide to add a Polarizing Filter to your arsenal, I have one final caveat.  There are two types of polarizers—linear and circular.  Linear polarizers are more effective than circular but, unfortunately, most cameras today will not autofocus properly if you use a linear Polarizing Filter.  Make sure you get a circular Polarizing Filter unless you intend to focus manually, and manual focusing can be a real pain after a very short while.  Additionally, you cannot tell if a Polarizing Filter is linear or circular just by looking at it.  That function has nothing to do with the shape of the filter or the fact that it rotates—it’s a physics thing that describes specifically how the filter acts on polarized light.  So, when you go filter shopping, look closely at the package.  Also, the outer ring of the filter should be marked with “Circular,” “Cir.,” “CPL,” “C-PL,” or some other notation indicating circular polarization.

What follows are examples of photographs taken with a Polarizing Filter.  The photographs in the left column were taken with the Polarizing Filter rotated for minimum effect, and to the right is the same scene taken with the filter rotated for maximum effect.  The first row shows how pictures taken in line with the sun show almost no effect from a Polarizing Filter.  The second row demonstrates the polarizing effect at the optimum right angle from the sun (note how those white cumulus clouds really pop out in the polarized shot).  The third row shows what happens to the uniformity of the polarization effect on a large swath of sky when using a wide angle lens.  Row four is an example of reflection elimination, and row five shows what happens to autofocus depending on whether or not that reflection is present.  Note also the increased color vibrancy of the tree and bush leaves in the polarized photographs in rows two and three compared with the non-polarized pictures to their left.

2 Comments

Filed under Photography

I’m Not Happy!


I used to work for a manager who stood approximately 4′ 10″.  Maybe.  In lifts.  On a good day.  Yes, the dude had a Napoleon Complex.  Worst I’ve ever seen.  One day, as I was departing the control tower in my car, I spied Mssr. Napoleon driving the opposite way, toward the control tower.  The window of his Ford Thunderbird was down, and he was frantically rolling it up just as my car hit a huge puddle of water.  Too late.  Mssr. Napoleon was drenched.  Excusezmoi, mon général.

We got out of our respective cars, and Mr. 4′ 10″ stalked over my way.  He said in a stern voice, “I’m not happy.”

To which I replied, “Okay.  Then, which one are you?”

I know.  Old joke.  It didn’t really happen, but I did once tell him during one of his many irrational rants and rages, “Hey!  Don’t get short with me.”  Almost as satisfying as the first story, but not quite.  At least this second story has the virtue of having actually transpired.  In front of witnesses.  Who desperately and unsuccessfully tried to stifle their concerted chuckles.  Which only made Mssr. Napoleon even angrier.

Today, it is I who is not happy.  And here’s why:  Regular readers of this blog have been shown on more that one occasion the damage former FAA Administrator Marion C. Blakey did to the FAA in general and to this nation’s air traffic control system in particular.  Her policies endanger people on a daily basis, and will continue to do so for perhaps another full decade to come, maybe even longer, and that can be directly shown by the nationwide increases in controller errors and some really close calls and near misses.

But let’s take a look at what happened just this week.  The National Aeronautic Association (NAA) is the official record keeper of all things aeronautical in the United States.  They determine who is the fastest, highest, flies the farthest, and climbs the quickest for everything from balloons to spaceships.  Their most prestigious award, and the one with which people are most likely familiar, is the Collier Trophy.  They give out a plethora of other lesser-known trophies and awards, including one called the Henderson Trophy, which is named after Clifford W. Henderson.

The Henderson Trophy is awarded to:  “ . . . a living individual, group of individuals, or an organization whose vision, leadership or skill made a significant  and lasting contribution to the promotion and advancement of aviation and aerospace in the United States.” 

This year’s winner of the Henderson Trophy is . . . drum roll, please . . .

Marion

C.

Blakey.

NAA, you simply have got to be kidding.

So, NAA, what happened?  Couldn’t get anyone actually worthy of the trophy to agree to show up at the award dinner this year?  Or, perhaps, you’re going alphabetically and this year it was time to select a “B”?  Or, as is most likely, is it that you people didn’t even know that Marion C. Blakey:

  • Failed in all attempts to bring on-time and on-budget so much as even one air traffic modernization project because she booted all the users (air traffic controllers) off the development teams and wound up with systems that subsequently didn’t work or were outright dangerous?
  • Negotiated while FAA Administrator to become the CEO of the Aerospace Industries Association (AIA), a trade group representing the same entities she was charged with regulating in her position as FAA Administrator?  (Ever hear the term, “Conflict of interest,” NAA?)
  • Awarded AIA member Lockheed Martin most of this country’s Automated Flight Service Stations (minus the ones in Alaska) , which resulted in an immediate and complete collapse in service while costing U.S. taxpayers far more than if that service had been retained in house?
  • Caused a mass-exodus of experienced controllers out of the agency, resulting in system-wide shortages of certified, competent controllers?
  • And in so doing increased air carrier delays to astronomical levels nationwide until the Great Recession helped abate the impact of her total mismanagement?  (How long do you think that decrease in traffic is going to last, NAA?)
  • While serious controller errors went through the roof to levels never before seen in this or any other country?
  • Even after the agency wiped off the books the most common classification of errors with a creative accounting scam called the “proximity event?

You guys over at the NAA really didn’t know all this stuff before you even nominated Ms. Blakey for the Henderson Award?  Do you people have any idea how foolish you’re all looking right now to those of us in the know?

But don’t just take my word for it:

If I were a past Henderson Trophy winner, I do believe I’d be sending mine back.  This year’s winner pretty much makes it worthless for anything but a paperweight.

4 Comments

Filed under Aviation Safety